

Originally published on Medium
This article was originally published on Medium on February 25, 2020.
In Figma, using defined styles (colors, type, effects, etc.) early and throughout a design project can have a lot of positive impact on your efficiency and output. I'm not necessarily here to sell you on using styles in Figma, but I would like to show you how to take a somewhat tedious process—setting up all the styles for a basic color system—and speed it up.
TL;DR
This really is a simple process, but some of the steps require a fair amount of explanation. So, I wanted to include a brief TL;DR for those who don't need all the additional detail.
- Create a shape layer and duplicate it as many times as the colors needed in your color system.
- Uniquely name each of the shapes. These names will determine the names of the color styles.
- Set the color of each shape layer appropriately to the needs of your color system.
- Select all those shapes and launch the Chroma Colors plugin to instantly generate the color styles.
Optional — select all the shapes and place them into an Auto Layout. With the shapes still selected, launch the Smart Text plugin to add a text label with the color name and hex values.
That's pretty much it. Continue reading for a more in-depth description.
If you'd rather see how this is done via video, I recently posted a video on YouTube showing the same process.
Note: I'm on a Mac and some of the keyboard shortcuts mentioned are platform specific. If you are on Windows, I believe you can swap out "control" for "command".
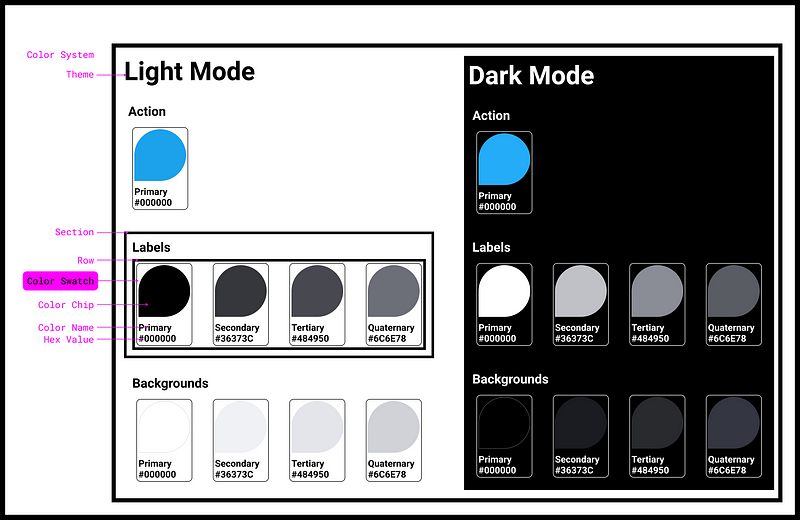
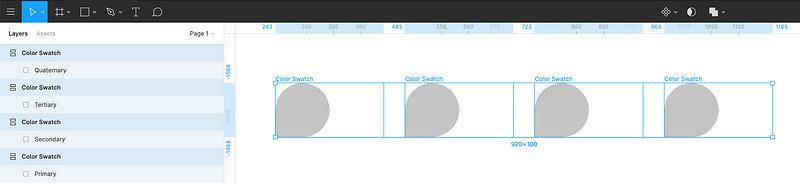
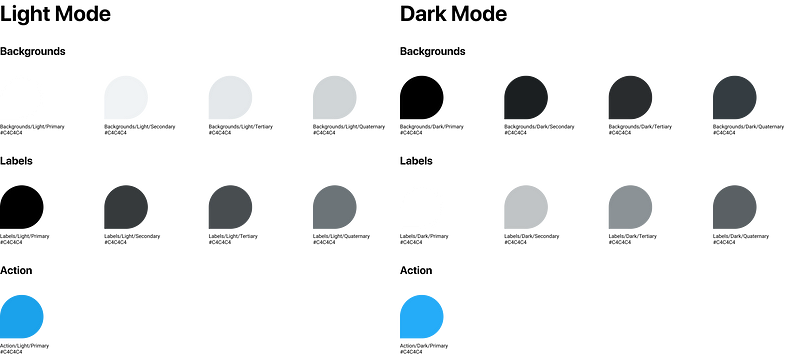
Not to overcomplicate things right out of the gate, but to clarify some terms I use throughout the article, you can refer to the graphic below to see what I mean by "Color Swatch" or "Color Chip".
OK. Still here? Let's get started.
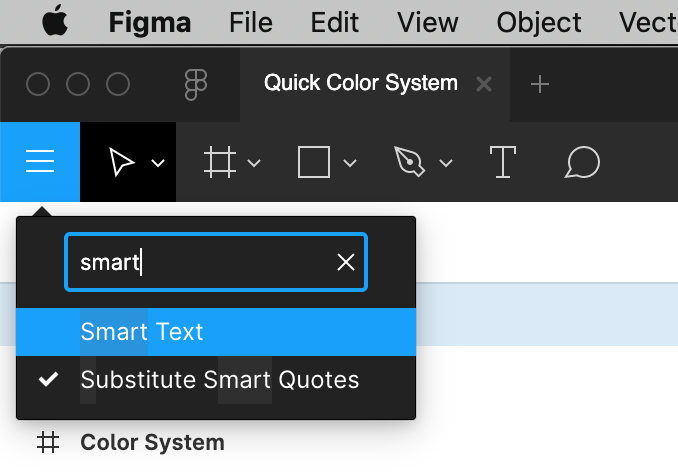
Step 0 — Install Plugins
Make sure you have these Figma Plugins installed:
This plugin will allow us to generate dynamic text labels that describe our colors by name and hex values.
This plugin allows us to very quickly generate and name an entire set of color styles.
Step 1 — Create a Color Chip and Color Swatch
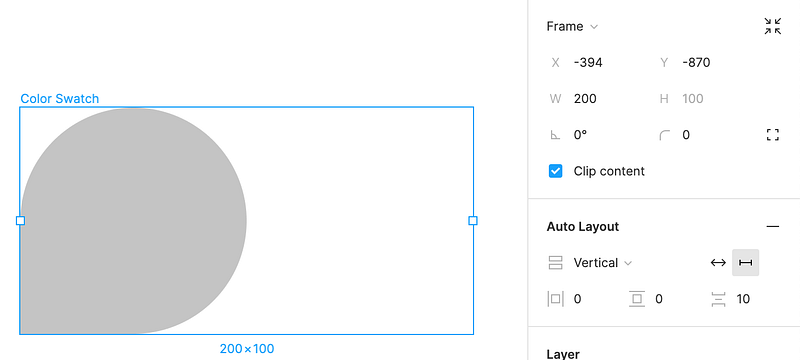
- Create a shape for your Color Chip. It can be any shape you want. I'm going to use a square with 3 rounded corners.
- While the shape is selected, place it into an Auto Layout frame (shift + A). Make sure the Auto Layout is set to vertical. This will allow us to later add our descriptive labels directly below the color chip without much fuss. Optionally, you can set a fixed width to about 200.
- Name this Auto Layout frame "Color Swatch"
Step 2 — Duplicate and Rename Swatches
- Make 4 duplicates of the Color Swatch frame
- Inside each Color Swatch frame, starting from left to right, rename the Color Chip layers: "Primary", "Secondary", "Tertiary" and "Quaternary"
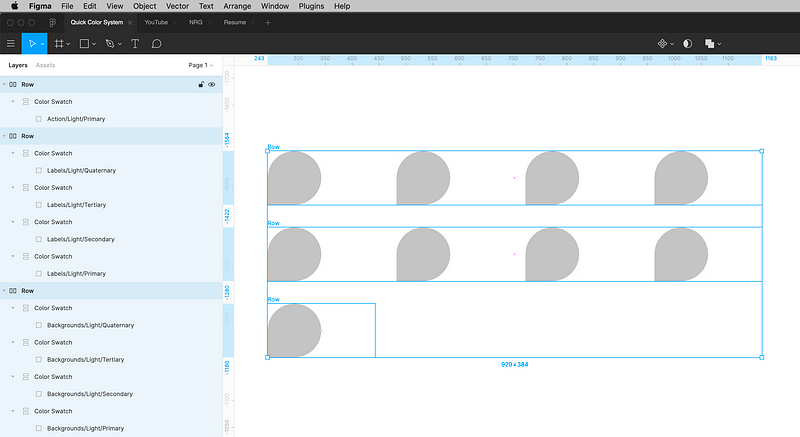
- Make sure these 4 Color Swatch frames are grouped and aligned horizontally. You can easily do this by selecting all the frames and hitting command + A. This will create a new Auto Layout frame. Let's name this new frame "Row".
- Duplicate this Row 3 times.
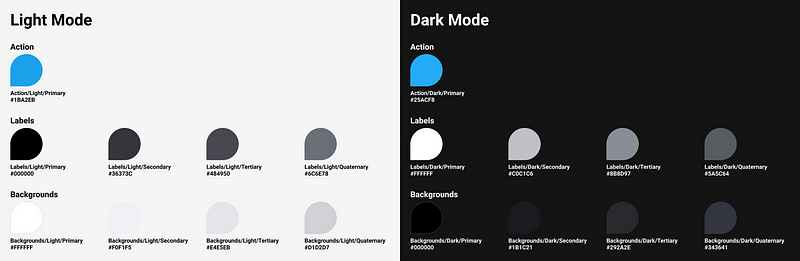
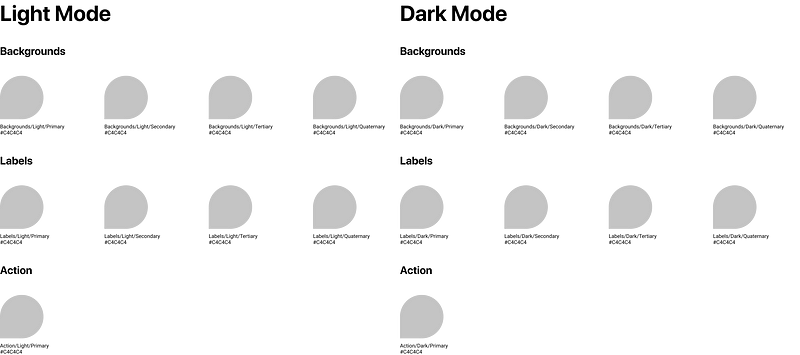
- Now, let's add some additional context to these Color Chip layer names. These descriptive names will be important when we use the Chroma Colors plugin to generate our color styles in Step 4. For each Color Chip layer name in the first Row, prefix them with "Backgrounds/Light/". For the next Row, do the same but prefix them with "Labels/Light/". For the last row, you can delete all but the first Color Swatch frames and rename it to "Action/Light/Primary"
- We now have all of our layers created and named for our light mode theme. Let's duplicate this entire set for our dark mode and with each Color Chip layer name, replace "dark" with "light".
- Optional — I'm going to add some additional labels for further visual context
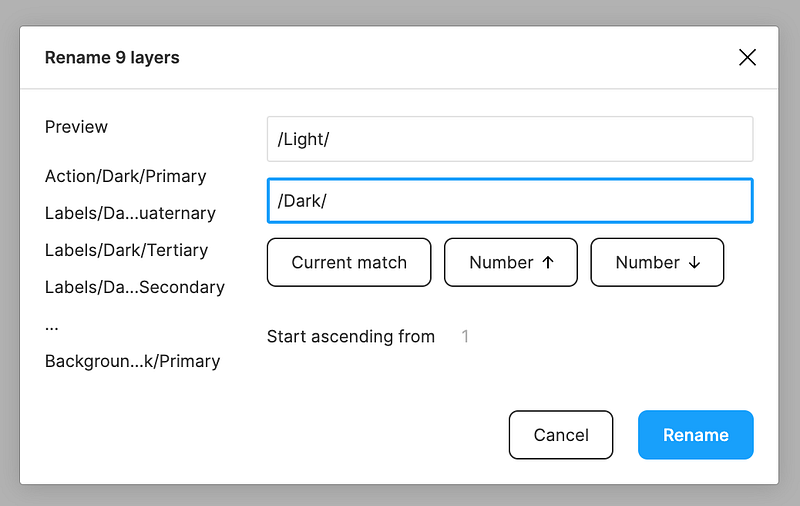
Tip: to quickly rename multiple layers at the same time, select more than one layer and hit command + R. You can click "Current Name" to include the current layer name as well.
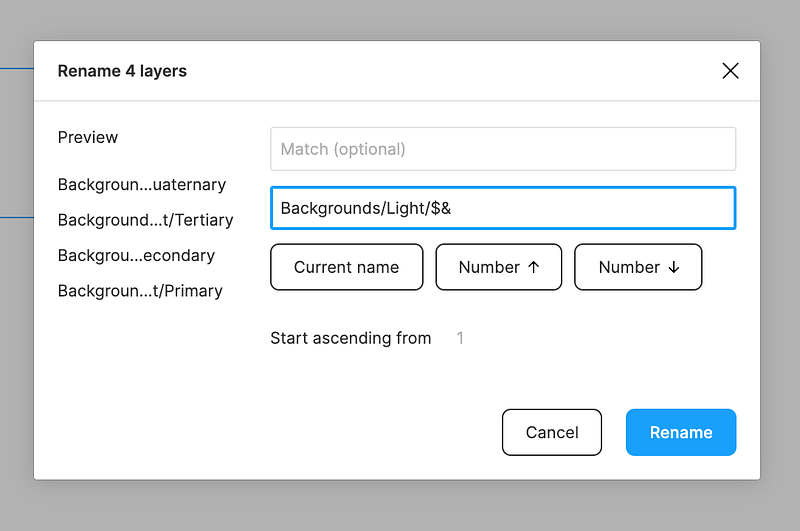
Tip: You can use the same rename dialog (command + R) to quickly 'match' and replace text.
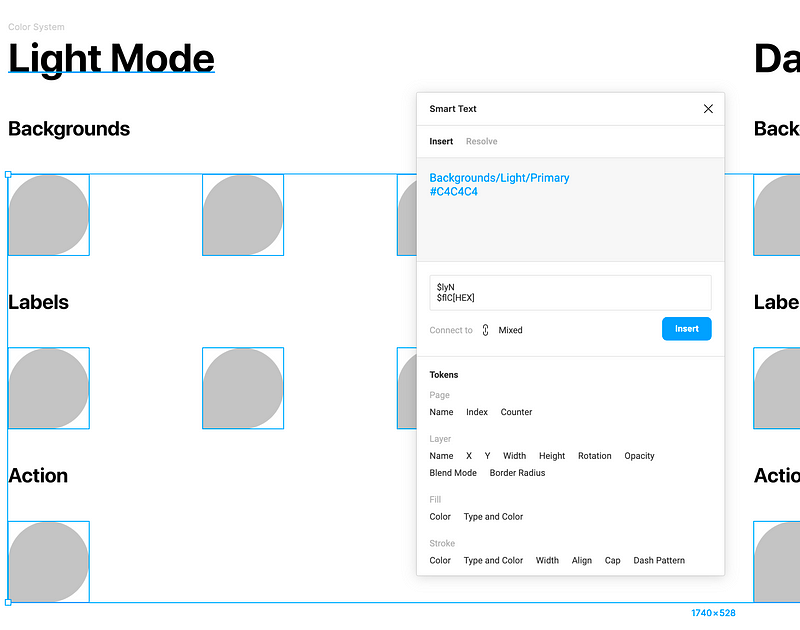
Step 3 — Add Labels with Smart Text Plugin
- Make a selection of all the color chip layers
- Open the Smart Text plugin
- Insert "Layer Name" and "Fill Color"
- Make sure to include a line break for clarity
Tip: You can quickly access all of your plugins by hitting command + / and searching for the plugin by name
Step 4 — Dial in the Colors and Create Styles
We now have all of the necessary elements created for our Color System but all of our colors are still the same! Let's fix that.
- Adjust the color of each layer appropriately for your color system — including both the light and dark themes.
- Tip: You can quickly lighten or darken a color by hitting the up or down arrows (also, try with the shift key) while the hex value is highlighted.
- Once we have have our chip colors dialed in, select each Color Chip and use the plugin Chroma Colors to generate all of your color styles.
Note: The Chroma Colors plugin has no UI. You simply select your colored layers, and launch the plugin. It will make a new color style with the same name and color of any layer you had selected when running the plugin. It's pretty awesome.
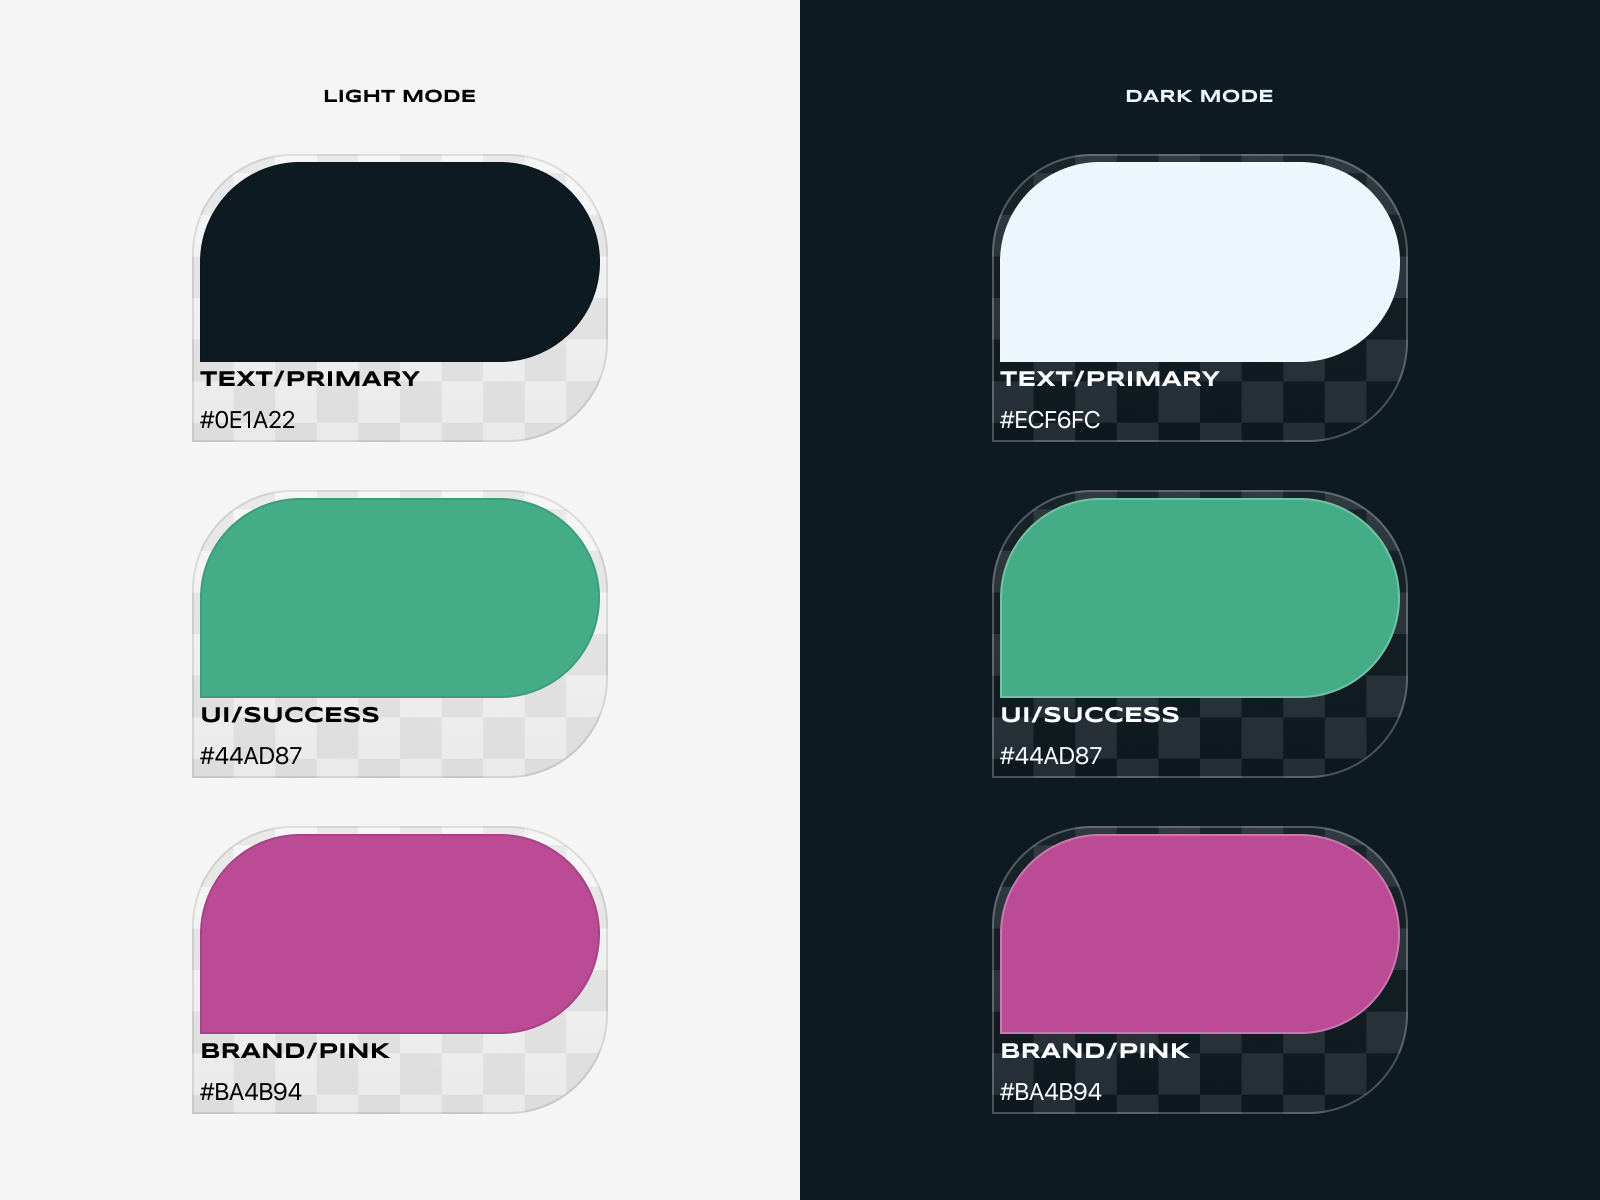
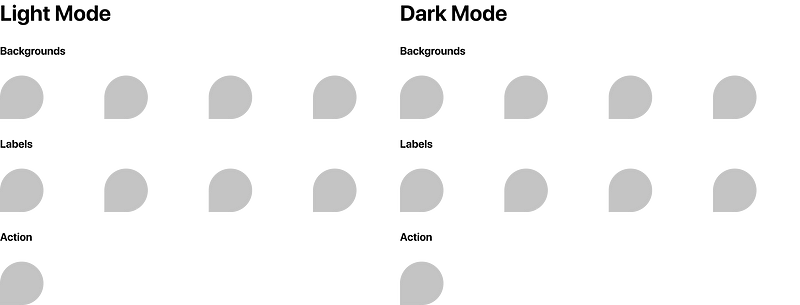
The color system that I'm creating here is pretty basic but can be extended as necessary. For the Light Mode theme, I'll set the four background colors from white to increasingly darker grays and the label colors from black to increasingly lighter grays. For the Dark Mode theme, it will be the reverse. The action colors for both Light and Dark Modes are very similar blues.
This article is not really about color theory, or helping you decide exactly what colors to choose for your system. That said, one thing I did that you may consider trying is bringing a bit of the hue from your action colors into the grays throughout your system.
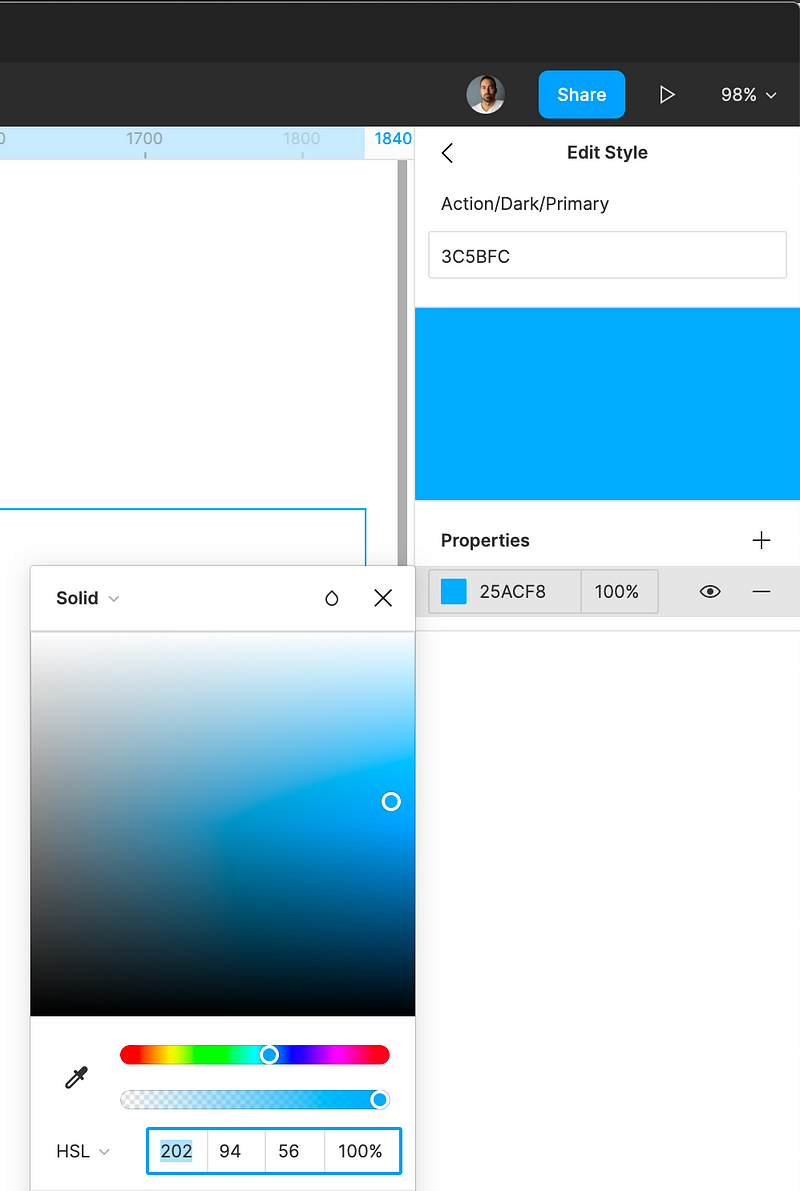
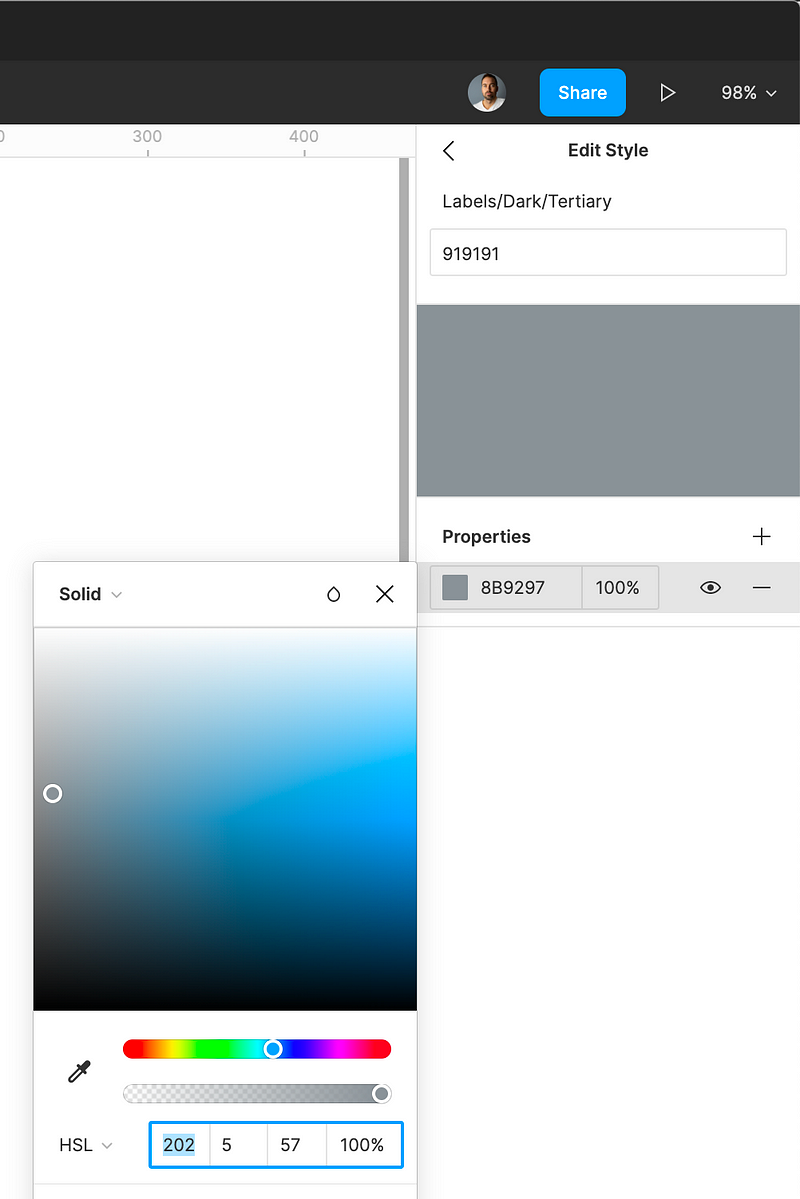
For example, the Hue (the H in HSL) of Action/Dark/Primary is 202. So in Labels/Dark/Tertiary I set the Hue to 202 as well and added just a bit (somewhere between 3% and 10%) of Saturation (the S in HSL).
And that's it. Hopefully my instructions were remotely clear and you now have a basic color system set up in Figma.
You can use these color styles in your layers, components, screens and pages. And if it turns out blue was not the right action color for this project, you now have a single place to make color adjustments and they will instantly propagate throughout your entire project.
Give it a shot and let me know what you think. Let me know if you have an even better way!